
Seasonal commission window open!
Now through Dec 1, I’ll be accepting commissions for delivery by Dec 24! Get your request in soon as I can only accept a limited

(Updated 19 July, 2022)
I originally posted this as a series to Instagram and Facebook, real-time as I completed each step, and I thought I’d record everything here for posterity. This is a run-down of all the steps that go into creating a hex sign, starting with research and moving through design and painting. I hope this is insightful and interesting!
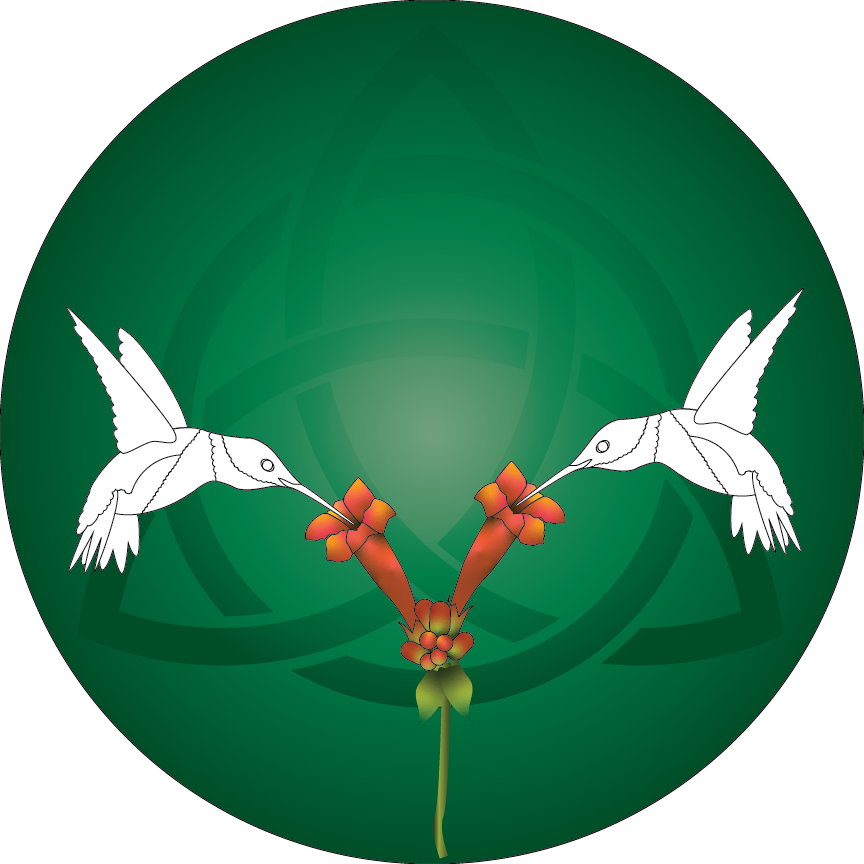
The sign in this process is a design I created specifically as a gift for my mother, who loves hummingbirds. As the spiritual gifts they offer are reflected in her personality, I presume this is a strong Animal Guide for her.
 The first thing I do with each sign is research. I look for spiritual meanings/gifts attributed to each animal in various systems, I research some basic facts about the animal, and I look at hundreds of photos of the animal to get a full picture of how best to represent it. Ted Andrews books are usually my first reach, then I’ll look at sites like Spirit Animal, What is My Spirit Animal?, and in this case, World Birds. Once I have some meaning keywords, I will research symbols that have similar or supporting meanings. In this instance, I knew I wanted to reflect the Tarot card “The Lovers”, which usually depicts three figures, and as my mother is Catholic, the Triquetra to represent the balance and unity of Three. Also, since she lives in Ohio (USA), I wanted to use a species that would be familiar to her, so I selected the Ruby-throated Hummingbird, which is quite common in Ohio.

Having an idea of where my design would go, I started researching source images. I learned in this process that only the male ruby-throated hummingbird has the eponymous ruby-throat! The female of the species is primarily white and a mousy brown, which a few subtle touches of green iridescence. She is also slightly larger than her male counterpart.
This sign also needed a floral element. Since my mother loves the color orange, I simply selected images of orange plants common to Ohio and known to attract hummingbirds. Simple, right?
The next step in every hex sign I create is illustration. Using the source images to get the shapes of the creature and other elements positioned, I draw out the sign in full in Adobe Illustrator. Depending on the signs, I may draw out some bits by hand, then scan and trace them in Illustrator, but usually I simply draw right in the application. After years of barely using it, I am getting back to my “fighting weight” in the software. Update: I no longer do this for all images. Some are simply pencil sketched and then painted. I will occasionally scan the final and outline it for a coloring page!
You can see here how I tested out various positions and worked toward the final design.


Once I have my design worked out, I create an “outline” version of the art and cut files for any elements I’ll need to cut masks for. Then I make three different sizes of the file, for an 8″, 12″ and 16″ diameter. Finally, I choose the size that my initial sign will be and print the outline file and masks in that size.
This is the part I documented on Instagram, so the rest of this might be old news.

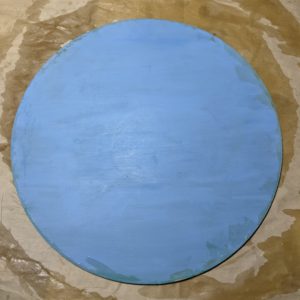
Step one: prep the board. I give it a light sanding and a thin coat of matte acrylic medium on both sides. I do this instead of gesso, which I feel hides the wood texture too much. Update: I have since moved to a clear gesso. It gives more tooth and a better seal, but essentially no real difference in function.

Step two: create a gradient background. Most of my animal guide signs have some kind of gradient in the background. I usually try to extend this to the edges so that it looks cohesive when it’s displayed. Update: In more recent pieces, this is often a full landscape background! This may require several steps.


Step three: mask and paint in background symbol with gilding paint. This paint is a mixture of acrylic medium and gilding powder. For most of my signs, I use a much higher proportion of powder to medium, but I wanted to have a light, ethereal, translucent effect here. Instead on 1:1, I went with about 1:5. The masking is contact paper, cut with my Silhouette machine. Getting this on straight and even is a challenge, but once it’s on, the crisp lines are much easier to achieve than it would be without a mask.

Step four: trace out design. I do all of the designs in Illustrator before I begin painting, then print to size so I can trace it out with Saral transfer paper. I use different color Saral paper depending on the design and background. Everyone guessing the design should be able to pick it out now.
Surround myself with source imagery!

Step five: underpainting. This is where I get the basic colors in place and fill in the outlines. Once I’ve done this I can gently wipe away the marks from the transfer paper. Some colors are more and some are less opaque, so I will apply several layers to complete the image.

Steps six and seven: this is shading and detail work and I usually work in color groups here. So first, I am working on the flowers with my oranges, browns, and yellows.

More step six/seven: leaf shading and detail.

Step six/seven: shading and detail work on our female hummingbird. Female ruby-throated hummingbirds are far less colorful than their male counterparts, with plumage of mostly white and a mousey gray. The feathers do have a slight green/blue iridescence, which I tried to capture both with pigment and some duochrome highlights.

Step six/seven, continued: the male ruby throated hummingbird, shading and detail. He’s a fun little guy full of color. Again, I’m working with some iridescent pigments to pick out the plumage. I remembered the feet.

Step six/seven: shading and detail on the second male ruby-throated hummingbird. Although his coloring is very similar to the other male, his posture means the light would’ve hitting the plumage a bit differently, so therefore the colors seem different.

Step eight: cleanup and refine the background. This is my chance to cut in any place I got a little nuts with my brush, remove dribbles, and sharpen edges. I decided to go just a bit more opaque with the gilding powder, to really give it a shine. Now I will ignore the piece for a while, so that I can come back with “fresh eyes” to make refinements.
Step nine: paint the reverse. I usually use a color from the background or some other coordinating color to paint the reverse. Also, I usually come back and do any touchups on the front before this, but I came back to this piece with fresh eyes and thought it looked pretty good.


Step ten: several coats of glossy polyurethane! I sand lightly between coats and apply at least four coats to the artwork side. This is the most time restrictive part, as I have to wait at least four hours between coats. With four coats on the front, two on the back, and 24 hours to cure, it means about two and a half days at the finish of each sign.
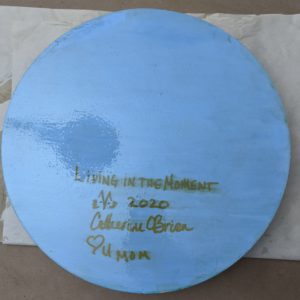
Step eleven: title, date, sign the back, and apply two coats of polyurethane. It’s almost done! The final step will be done tomorrow morning!


Step twelve: the final step! Every sign comes to my altar for cleansing and consecration. First, it is “washed” by earth and water (sea salt water), fire and air (incense). Then I present it to each of the four cardinal directions for their blessings. Finally, I tell it its purpose and its name, and breathe it into life. The incense I used for this sign was Jubilee! A joyful blend, perfect for living in the moment!
Now through Dec 1, I’ll be accepting commissions for delivery by Dec 24! Get your request in soon as I can only accept a limited

I’ve been pondering how to make my art available to all and still make the hand-painted “original” versions worth doing for a while. Since discovering

Starting in June, all new non-activism products will be available to Patreon patrons FIRST for at least one week. Official & VIP patrons will have

Many magical people like to use an object or an image as a focus for their work, specifically if they know that others will be

Due to current events, I’m putting a pause on the elemental avatar series to work on an activism piece. I don’t think this comes as

I have had an Etsy store since I started this journey, but I’ve only ever had a few pieces on there, and really two sales.